Add a web part to SharePoint Online
Follow these steps to add a web part to SharePoint online site.
Prerequisites
- You must have ‘edit’ permissions to edit the site page and add the web part.
- Make sure site page isn’t checked out by any other user and is available for editing.
Steps to follow
- Go to your SharePoint online site.
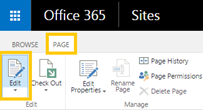
- Click the Page tab available on the top of the page. Under the page tab – click Edit.
Note: If the Edit option is disabled, you may not have the permissions to edit the page. Please contact site administrator.
- Click on the area where you would like to add your web part.
-
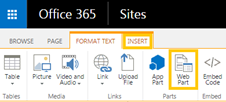
Click Web part under the tab INSERT
-
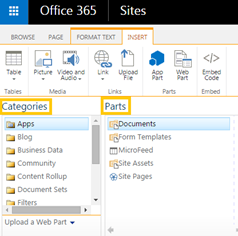
Select a web part category under Categories e.g. Apps. Select a web part you want to add to the page e.g. Documents and then click button Add.
-
Select the web part and click on drop down menu available on top right of the web part to edit the properties, such as layout.
-
When you done with editing the page. Click Save under the Page tab.


Leave a Reply